Apply Different Effects to Targets in a Photo
Atualizado em 9 de set. de 2026
Apply Mosaic to a face and black Color to a license plate in the same photo, then save both effects together. Use individual settings without replacing the other target’s effect.
Before you start
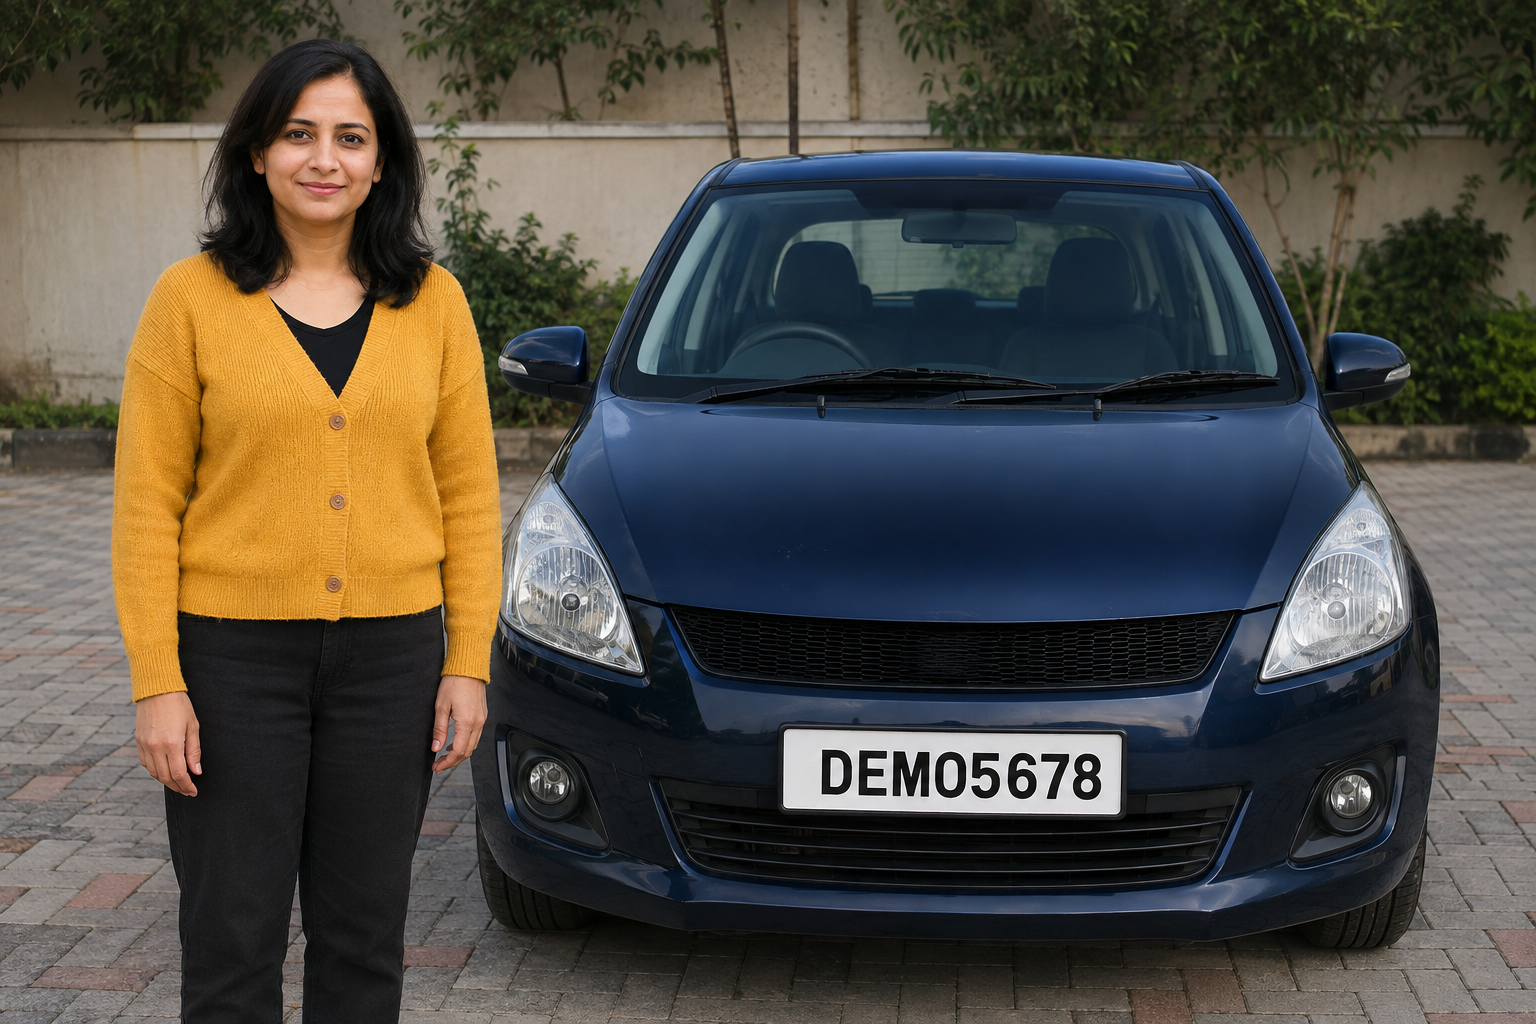
Use a photo containing one face and one license plate. Download the sample below or use your own photo with targets that need different effects.
Assigning a different effect to each target requires Pro or higher.
1. Open a photo with two targets
In the dashboard, choose Upload files and select mixed-face-plate.png. After upload and analysis finish, open that photo in the Studio.
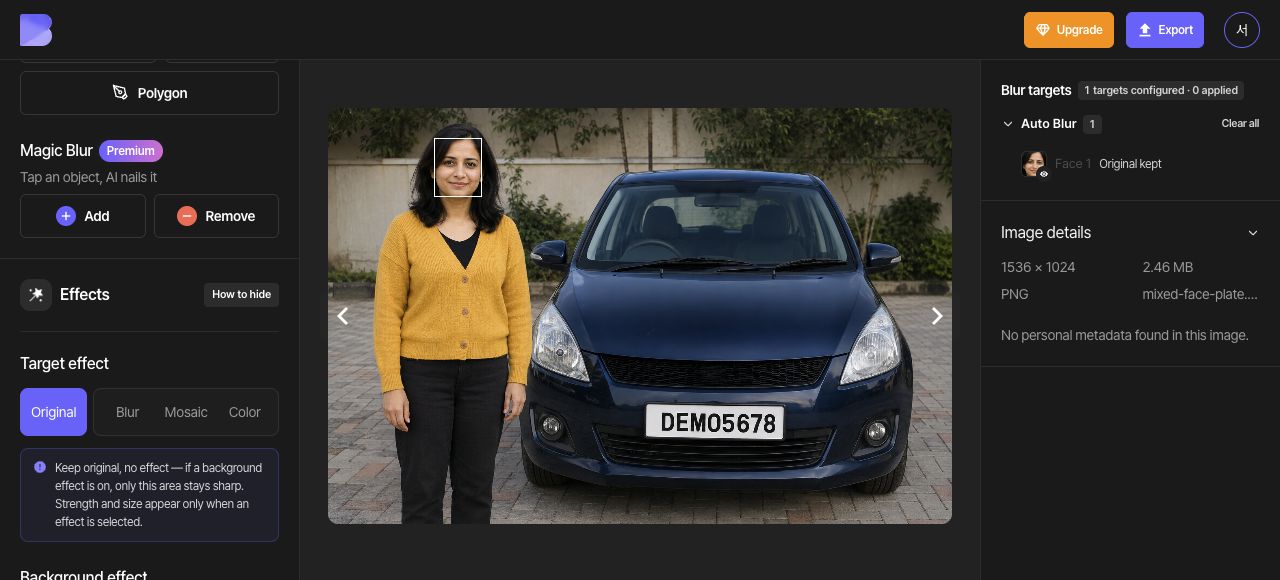
Set the overall Target effect to Original. Locate the person's face and the license plate. You will apply Mosaic to the face and black Color to the plate in this photo.
2. Detect the face and plate
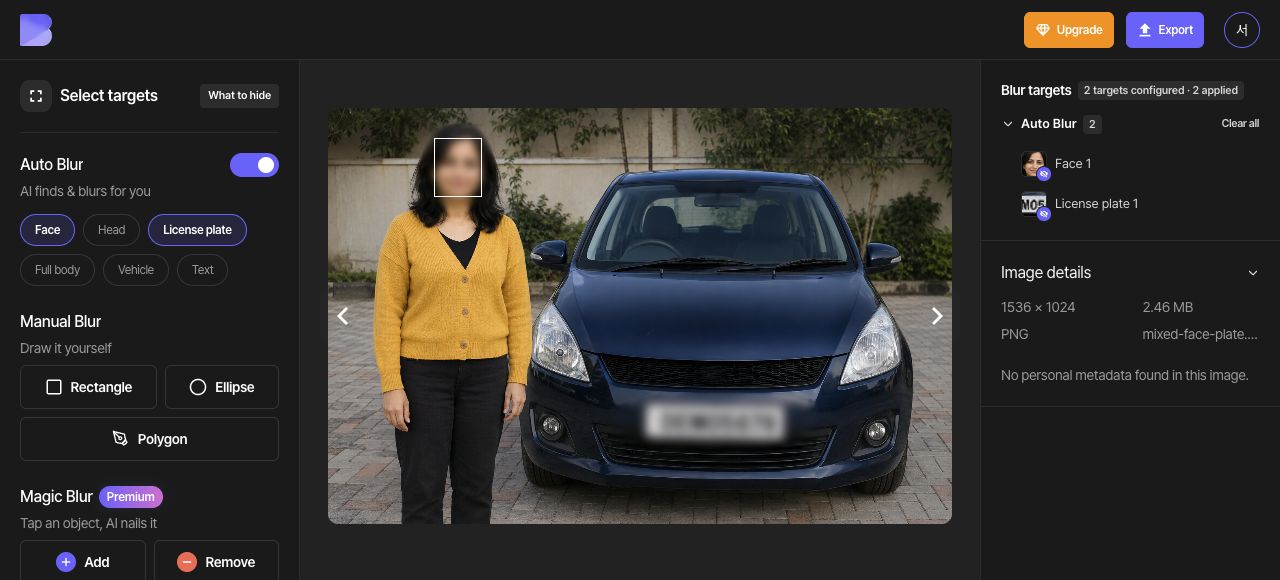
Enable Face and License plate under Auto Blur. Confirm that there are two detected targets, one face and one plate, then set the overall Target effect to Blur.
3. Apply Mosaic only to the face
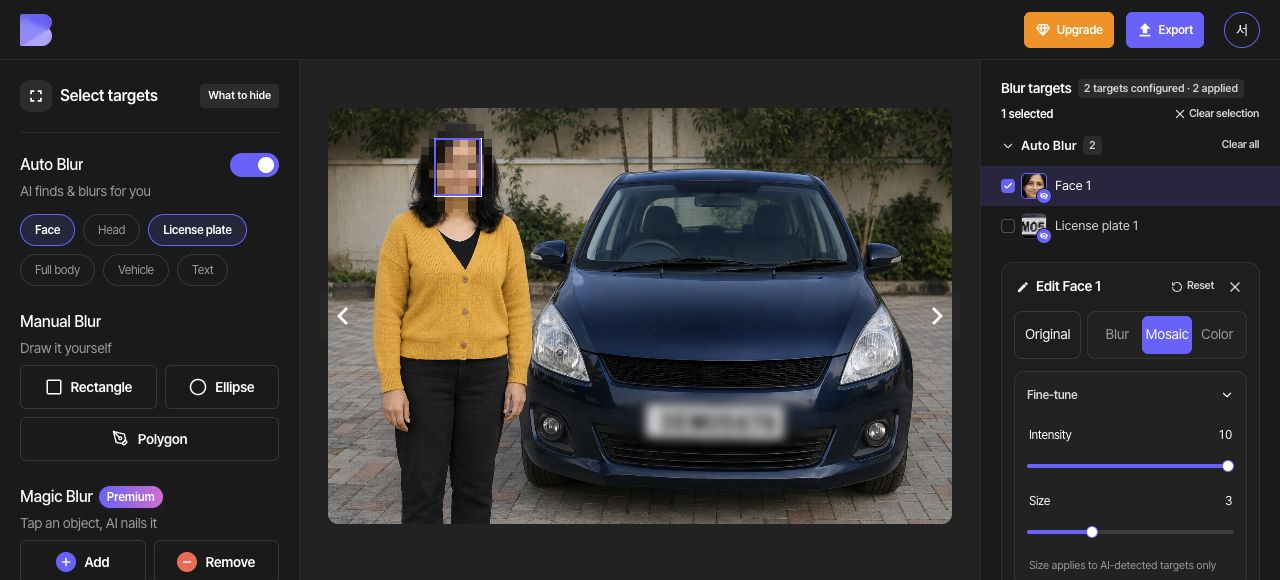
Use the Select Face 1 checkbox in the target list. In the right-hand Edit Face 1 panel, choose Mosaic and set Intensity to 10 and Size to 3 under Fine-tune. Check that only the face changes to Mosaic.
4. Apply black Color only to the plate
Use Clear selection, then select the Select License plate 1 checkbox in the target list. In the right-hand Edit License plate 1 panel, choose Color and the black swatch (#000000). Check that the face retains its Mosaic effect.
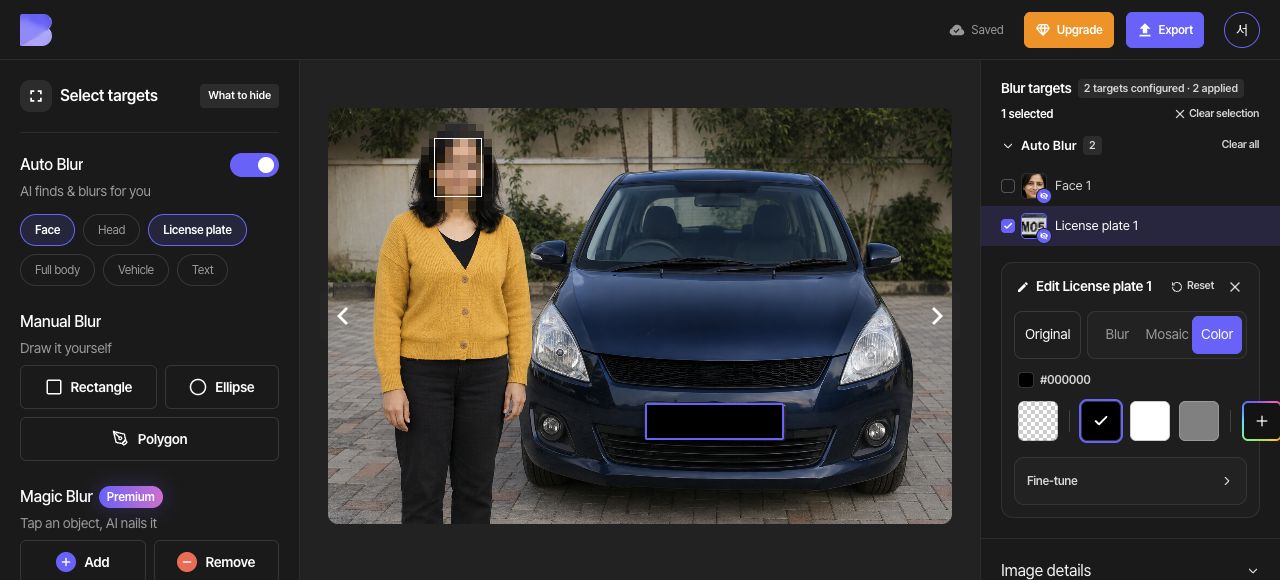
5. Check both effects together
Use Clear selection to remove the editing overlay and review the full photo. Confirm that the face stays mosaicked and the plate stays black. Each target's individual setting takes precedence over the overall Target effect.
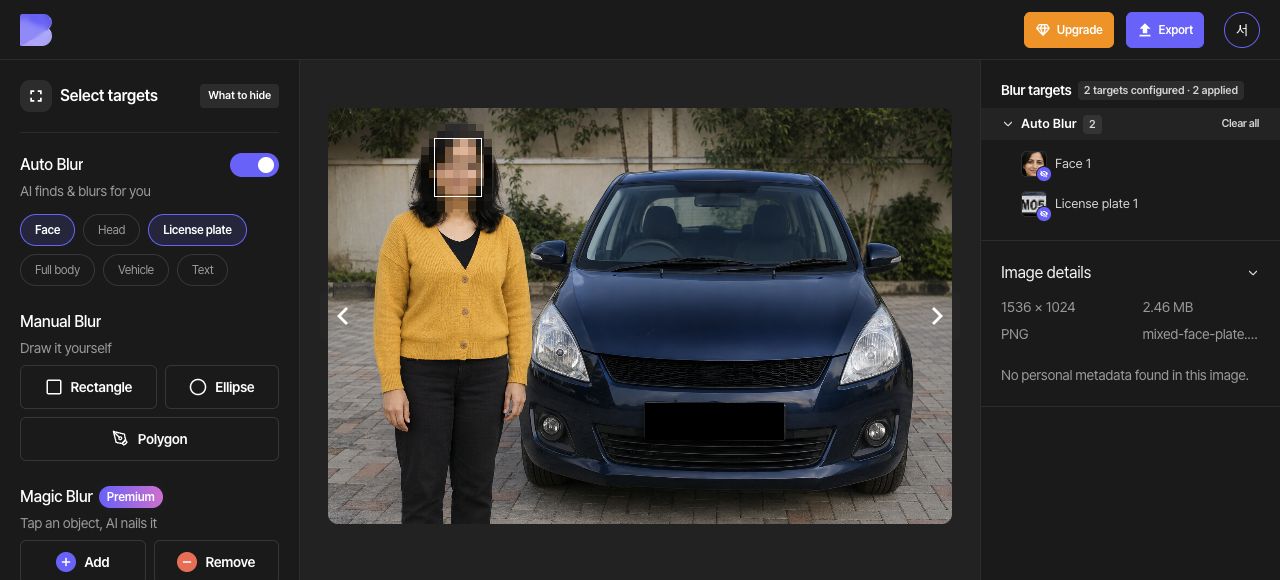
6. Export as JPG
Open Export at the top and select JPG. Set the file name to mixed-face-plate-edited. Keep Quality at Default, then review the on-screen credit and usage notice before starting the export.
7. Check the downloaded file
After export completes, use Download for the same photo in the dashboard. Wait for the browser download to finish, then open the file on your device and check its name and extension.
Zoom in on both targets and check that the face retains Mosaic and the plate retains black Color. Perform this check in the file you just received as well as in the editor.