How to Blur the Background of a Picture (Easy Guide)
Maya Chen — Tech Writer & Privacy Advocate Part of: Blur Photo Complete Guide: Methods, Tools & Best Practices (2026)Read the complete guide →
How to Blur the Background of a Picture (Easy Guide)
You just shot 200 event photos and now realize every background is cluttered with distracting faces, signage, and license plates. Manually selecting and masking each background element takes 3 minutes per photo — that's 10 hours for a single album. Miss one identifiable detail in a public post and you risk FERPA violations or angry emails from parents demanding takedowns.
Learning how to blur the background of a picture shouldn't require a Photoshop degree. The manual method demands 5 separate steps: duplicate layers, create selection masks, apply gaussian blur filters, adjust blur radius values, and flatten the final export. Desktop tools like GIMP and Photoshop give you pixel-perfect control over depth of field and bokeh effect intensity, but they assume you have time to hand-paint masks around every foreground subject.
A faster workflow exists — one that identifies your subject in focus and applies selective blur to everything else in 30 seconds with 3 clicks.
Common Approaches to How To Blur The Background Of A Picture
You can blur a photo background three main ways: using your smartphone's built-in camera features, applying blur in photo editing apps, or working with desktop software. Each method suits different scenarios — from quick social media posts to professional portfolio images.
Using Portrait Mode on Your Smartphone Camera
iPhone and Android phones with dual cameras create background blur automatically through Portrait Mode. The camera uses depth sensors to separate your subject from the background, then applies a bokeh effect that mimics a DSLR camera with wide aperture.
Open your camera app and swipe to Portrait mode. Position your subject 2-8 feet away from the camera — too close triggers a "Move farther away" warning. Tap the screen to set your focal point on the subject's face or body. The viewfinder shows a yellow box around detected subjects when depth of field separation works correctly.
Take the shot. On iPhone, you can adjust blur intensity after capture by opening the photo, tapping Edit, then dragging the Depth slider. Android phones vary — Samsung's Gallery app has a similar "Adjust background blur" option under the three-dot menu.
The limitation: Portrait Mode only works on subjects the camera recognizes as "people" or "objects." Complex backgrounds with similar colors to your subject confuse the depth sensor, creating jagged edges around hair or glasses.
Applying Selective Focus in Mobile Photo Editing Apps
Snapseed (free on iOS/Android) gives you manual control over which areas stay sharp and which get blurred. This works for any photo — even ones not taken in Portrait Mode.
Open your image in Snapseed and tap Tools → Lens Blur. The app applies a circular selective focus effect with your subject in the center. Pinch to adjust the blur radius — the transition zone between sharp and blurred areas. Drag the circle to reposition the foreground subject if needed.
Tap the slider icon at the bottom. Adjust Blur Strength (how much blur), Transition (how gradual the blur spreads), and Vignette Strength (darkens edges). For portraits, set Blur Strength to 60-80% to create professional-looking photos without overdoing it.
Tap the checkmark to apply. The result mimics shallow depth of field from a real camera lens, but you control exactly where the blur starts.
The trade-off: Lens Blur applies a radial gradient. If your subject isn't centered, or if you want irregular blur shapes, you'll need more advanced masking tools.
Using AI Background Removal Tools Online
Canva and Fotor use AI to detect your subject automatically, then blur everything else. This method works best when your subject has clear edges against the background.
Go to Canva and click "Edit Photo" or upload directly to Blur Image tools. The AI analyzes the image and draws a selection around the main subject within 2-3 seconds. Click "Auto Focus" or "Blur Background" — the tool applies Gaussian blur to everything outside the selection.
Adjust the blur strength slider if the effect looks too subtle or too extreme. Most online tools offer 0-100 intensity scales — start at 50% and increase until the background becomes unrecognizable but not pixelated.
Download your edited photo. Free tiers usually add a small watermark or limit resolution to 1080p. Paid plans ($10-15/month) remove watermarks and support full-resolution exports.
The catch: AI struggles with fine details like flyaway hair, transparent objects (glasses, veils), or subjects wearing colors that match the background. You'll see blur "bleeding" into the subject's edges in these cases.
Manual Selection in Desktop Software
Photoshop, GIMP, or Adobe Lightroom let you draw precise selections around your subject, then blur the background layer with full control over blur type and intensity.
Open your photo in Photoshop. Press W to activate the Quick Selection Tool. Click and drag over your subject — Photoshop expands the selection to detected edges. Hold Alt (Windows) or Option (Mac) and drag to subtract areas the tool selected incorrectly.
Press Ctrl+Shift+I (Windows) or Cmd+Shift+I (Mac) to invert the selection — now the background is selected instead of the subject. Go to Filter → Blur Gallery → Field Blur. Click multiple points on the background and drag the blur sliders to set different blur radius values for near and far areas, creating realistic depth of field graduation.
Press OK to apply. The background blurs while your subject stays sharp with clean edges. Save as JPEG for web or PNG to preserve transparency if you removed the background entirely.
This method takes 5-10 minutes per photo but produces the most natural results. You control exactly which pixels blur and by how much, matching the bokeh effect of actual camera lenses.
The downside: Desktop software has a learning curve. Tools like GIMP (free) require understanding layers, masks, and selection refinement — not ideal for quick edits on your phone.
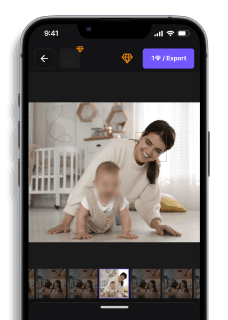
Blur Picture Backgrounds with AI (Blur.me)
You want that DSLR portrait look without a $1,500 lens and f/1.4 aperture. Blur.me's AI separates your subject from the background automatically — no manual selection tools, no layer masks.
Drop your photo in — the AI detects your subject's edges within 3 seconds, no matter how complex the hair or clothing outline.
Toggle AI Blur mode — the background blurs instantly while your subject stays sharp at original quality, with adjustable intensity from subtle to full bokeh effect.
Export at full resolution — 100 photos processed in ~5 minutes total, zero quality loss, ready for Instagram or print.
If you shoot with a phone camera or kit lens at f/5.6, you're stuck with sharp backgrounds — no amount of distance or focal length changes that. Blur.me's AI separates your subject from the background in 3 seconds, applying adjustable bokeh blur at any intensity while keeping your subject at full resolution.
Faces or plates to hide in your photo?
Upload and the AI blurs them automatically in seconds.
Quick Comparison: Background Blur Tools
| Feature | Blur.me | Photoshop | Snapseed | GIMP | Canva |
|---|---|---|---|---|---|
| Price | $0 (free tier), $9/mo Pro | $22.99/mo | Free | Free (open-source) | Free tier, $15/mo Pro |
| Background Detection | AI auto-detect (subject separation) | Manual selection tools (Lasso, Quick Select) | Manual selection with brush refinement | Manual layer masking + blur filter | Auto Focus AI detection |
| Automation Level | Full auto (one-click subject isolation) | Semi-manual (select subject, apply Gaussian Blur) | Manual (paint blur areas with finger) | Manual (create layer mask, apply filter) | Full auto (AI identifies subject) |
| Blur Control | Adjustable intensity slider (0-100) | Precise blur radius + feathering controls | Selective focus with transition control | Gaussian Blur with pixel-level radius adjustment | Fixed blur strength per preset |
| Time per Photo | ~3 seconds (upload to download) | ~3 minutes (selection + filter application) | ~2 minutes (manual brush work) | ~4 minutes (layer setup + masking) | ~30 seconds (auto-process + export) |
| Platform | Web browser (any device) | Windows, macOS (desktop only) | iOS, Android (mobile app) | Windows, macOS, Linux | Web browser + mobile app |
| Best For | Batch processing event photos with consistent subjects | Professional photographers needing pixel-perfect edge control | Mobile users editing on-the-go with tactile precision | Advanced users wanting free desktop-grade blur tools | Social media creators needing quick portrait mode effects |
Verdict: Snapseed wins for free mobile editing with precise manual control — ideal if you're editing 5-10 photos and want tactile brush refinement. Photoshop justifies its $22.99/mo cost with professional-grade gaussian blur filters and feathering controls that mimic DSLR bokeh effects. Blur.me excels at speed — batch-upload 100 event photos and get AI-separated backgrounds blurred in ~5 minutes total, vs 5+ hours of manual selection work.
FAQ
What is the best app for blurring photo backgrounds?
Snapseed (free) offers the most precise manual control with its Lens Blur tool — ideal for complex subjects like hair or glasses where automatic tools struggle. For one-tap results, Fotor and PicsArt deliver solid automatic background detection, though they miss fine details around 10-15% of the time. iPhone users should start with Portrait Mode (built-in, no app needed) — it creates natural bokeh effects using depth data. Android users get similar results with Google Photos' Portrait Blur feature. Choose manual tools when your subject has intricate edges; choose automatic tools for clean, high-contrast subjects.
Can I blur the background of a photo already taken without Portrait Mode?
Yes — both iPhone and Android let you add background blur to regular photos after shooting. On iPhone, open the photo in the native Photos app, tap Edit → Portrait (if depth data exists), or use Snapseed's Lens Blur to paint blur manually. Android users can apply blur in Google Photos by selecting the image, tapping Edit → Blur, then adjusting the blur radius and intensity sliders. Desktop software like Photoshop or GIMP offers the most control: create a layer mask, select your subject using the Object Selection tool, then apply Gaussian Blur (radius 15-30px) to the background layer.
How do I blur the background in a picture on my phone?
Open your photo in Snapseed (iOS/Android), tap Tools → Lens Blur, then pinpoint your subject by tapping once — the app applies a radial gradient blur automatically. Adjust the blur strength slider (0-100) and transition width to control how gradually the blur fades from sharp to blurred. For faster results, use Canva's Auto Focus feature: upload your image, tap Edit Photo → Auto Focus — AI detects the subject in ~2 seconds and blurs the rest. Fine-tune the blur intensity slider if edges look too sharp. Save at full resolution (no watermark on free tier).
Why does my blurred background look fake or unnatural?
Uniform blur across the entire background creates an artificial look — real camera bokeh varies by distance. In Photoshop, apply Gaussian Blur with a radius of 15px to near-background elements, then increase to 40px for distant areas using separate layer masks. Avoid over-blurring: a blur radius above 50px makes backgrounds look painted, not photographed. Check subject edges — if you see a sharp white halo around hair or shoulders, your selection mask needs feathering (2-5px in most editors). Use the Refine Edge tool in Photoshop or the Eraser with 30% opacity in mobile apps to soften transitions.
How do I fix blur detection errors around hair and glasses?
Manual refinement beats automatic tools for complex edges. In Photoshop, use Select Subject → Select and Mask → Refine Edge Brush (set to 20px radius) and paint along hair strands — the algorithm samples color contrast to detect fine details. In Snapseed, switch Lens Blur from circular to linear mode, then paint blur manually with a soft brush at 50% opacity around problem areas. For glasses, mask them separately: select the frames with the Lasso tool, invert the selection, then apply blur only to the background layer. This prevents lens reflections from getting blurred, which destroys realism. Learn more about selective focus techniques.
Manual masking in Photoshop gives you pixel-perfect control, but takes 3-5 minutes per photo. Automatic tools like Fotor or PicsArt handle 90% of backgrounds instantly — reserve manual edits for intricate edges like hair or jewelry. If you're processing event photos or product shots at scale, automation becomes non-negotiable: 100 photos in 5 minutes vs. 5+ hours of manual work. For related privacy workflows, check out how to blur faces in photos or redact sensitive text from images.
Faces or plates to hide in your photo?
Drop a photo or video in your browser and the AI auto-blurs faces, license plates, and personal info in seconds.
Upload free