Hide an Object in a Photo with Magic Blur
Mis à jour le 9 sept. 2026
Create a Magic target that follows an object’s outline, apply Blur, and save the photo. Refine the selection if it misses part of the object or includes background.
Before you start
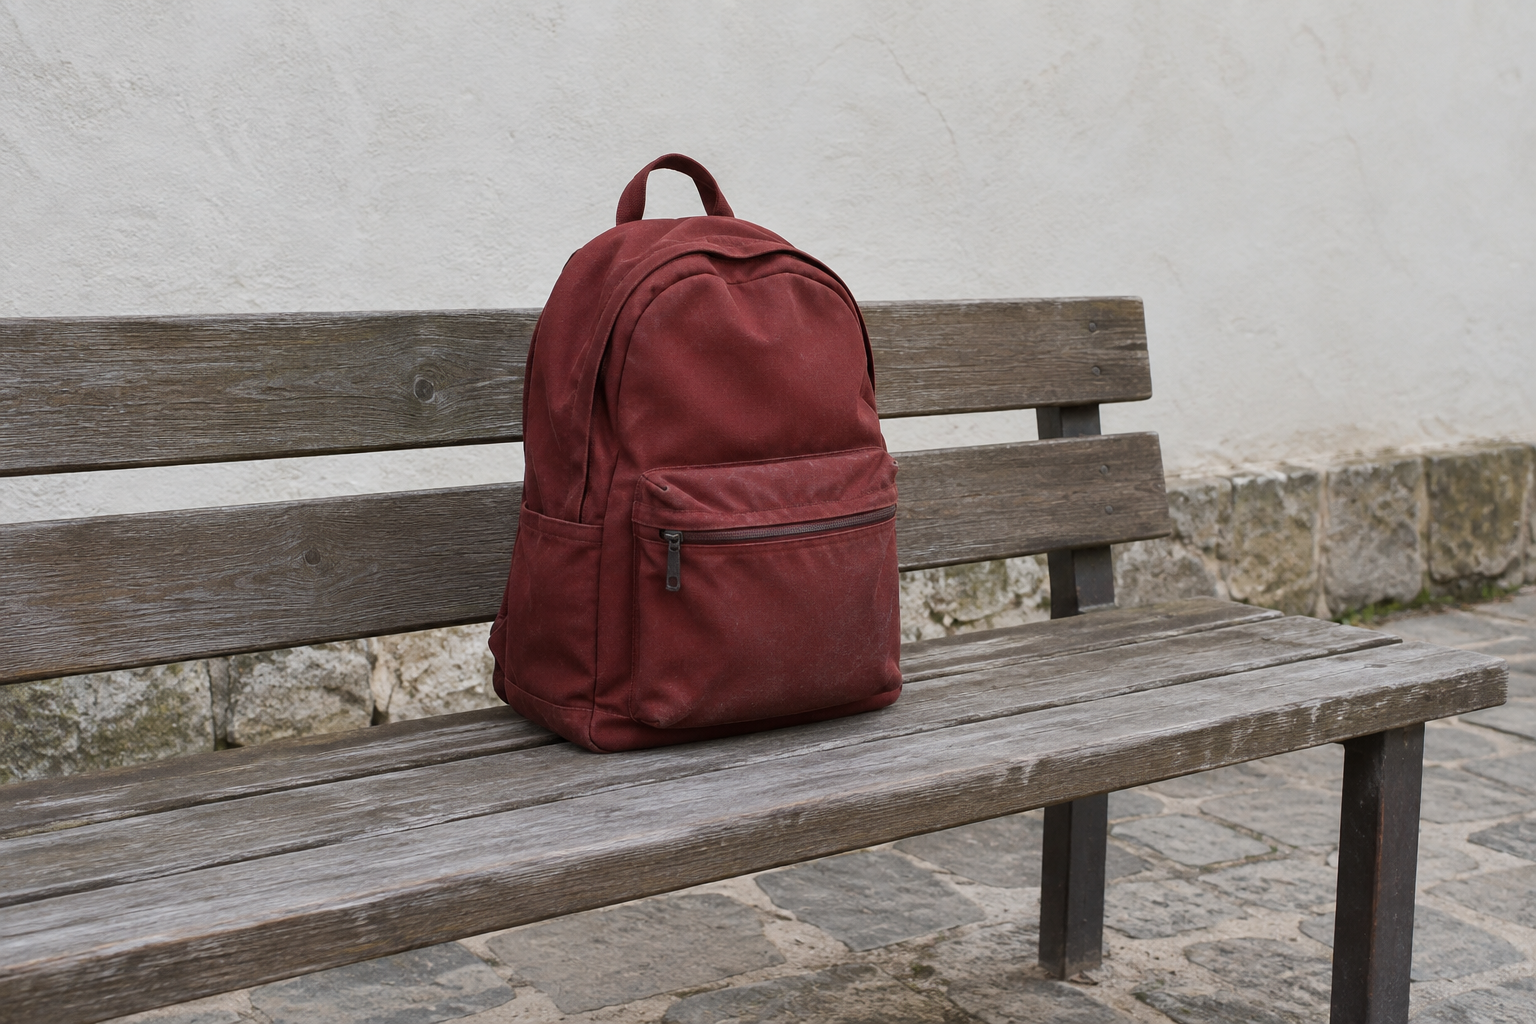
Use a red backpack photo with the bench visible through the handle opening. Download the sample below or use your own photo containing an object to hide.
Magic Blur selection requires Starter or higher.
1. Open the photo and locate the object
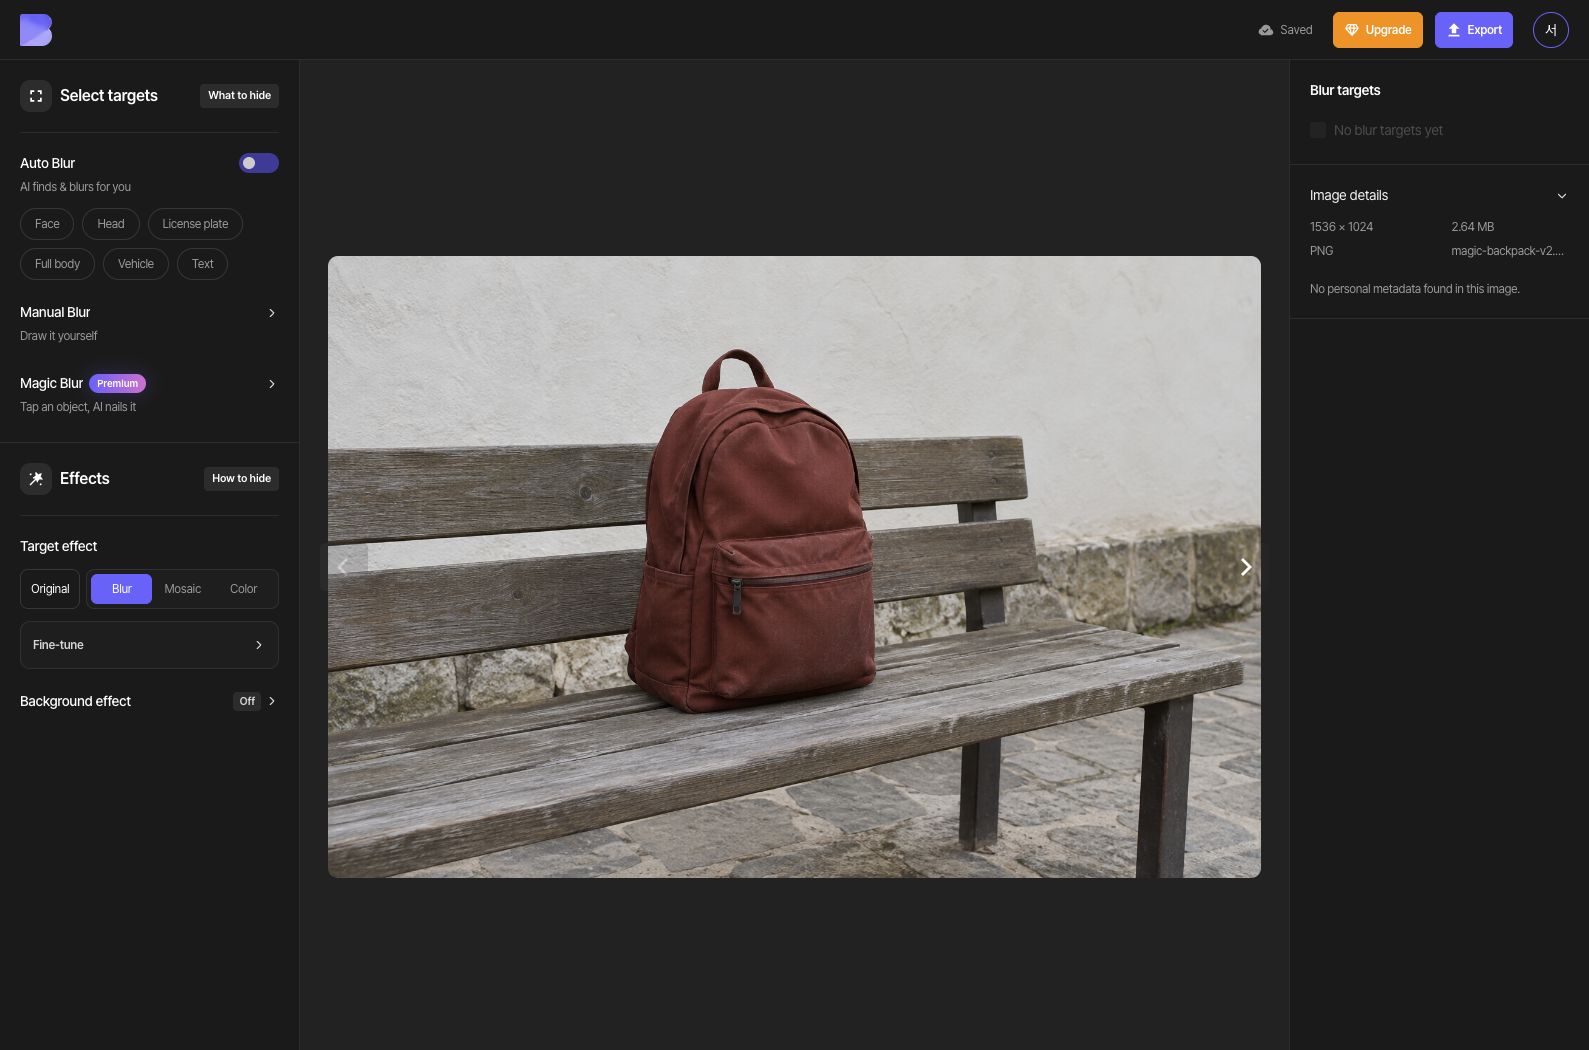
In the dashboard, choose Upload files and select magic-backpack-v2.png. After upload and analysis finish, open that photo in the Studio.
Locate the red backpack and the opening inside its top handle. You will blur the backpack and leave the bench unchanged.
2. Add a point and check the selected area
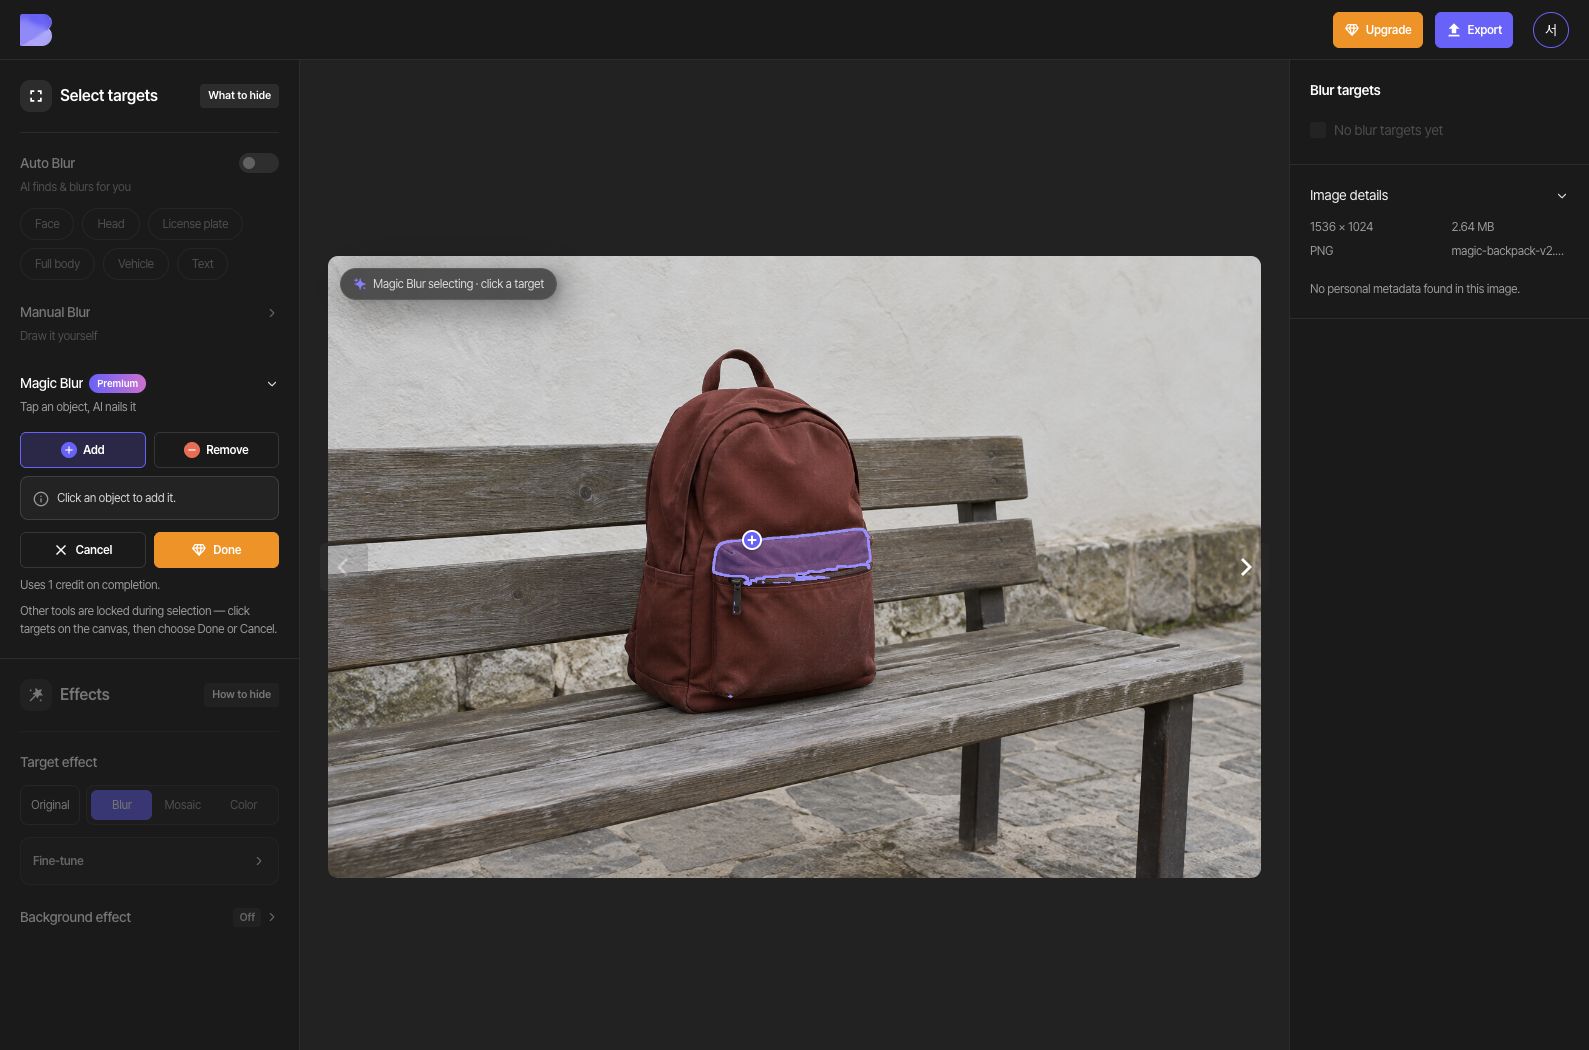
Start Magic Blur, choose Add, and click inside the flap above the backpack’s front pocket. Make sure Magic selection is active rather than simply clicking in the normal canvas selection mode. The first point in this sample selects only the horizontal flap; include the main body in the next step.
3. Add a second point to include the whole backpack
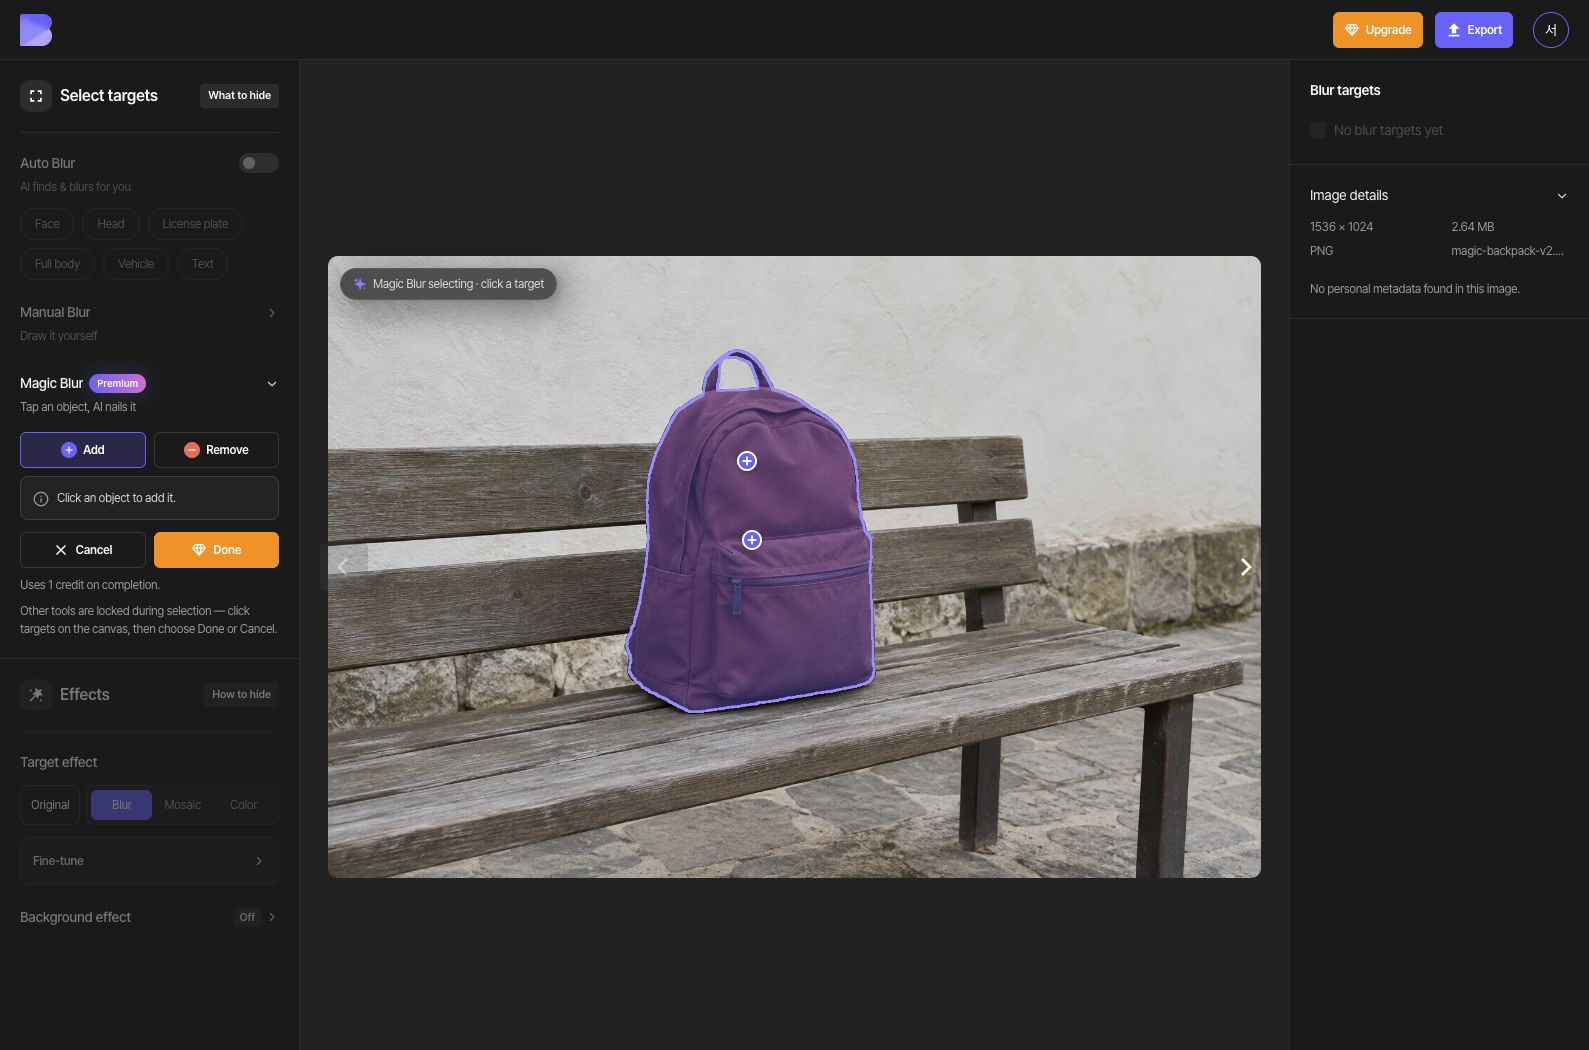
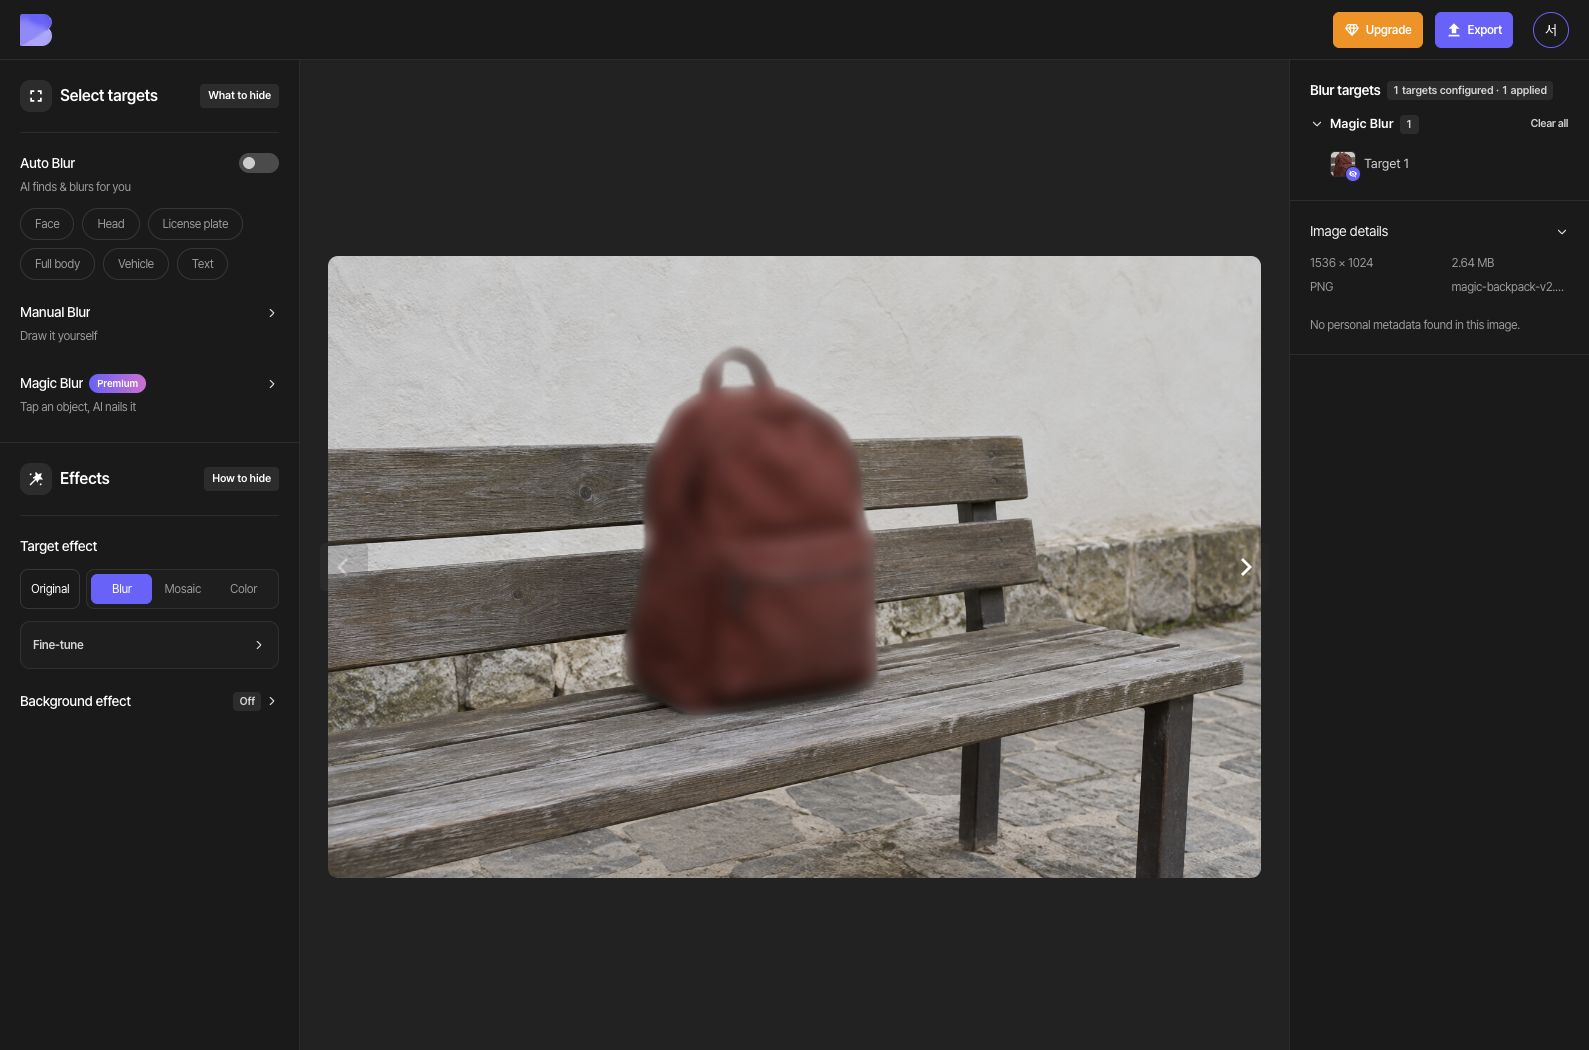
Keep Add selected and click once more inside the upper main body of the backpack. The second point expands the selection to the whole backpack and its handle. Check that the outer contour is included and the empty handle opening stays outside the selection.
The background inside the handle opening is excluded automatically in this sample. If your own photo includes unwanted background, choose Remove and click inside that background to refine the selection.
4. Finish the selection and check the blur
Check the on-screen usage notice and choose Done. Choose Blur under Target effect and adjust its strength. Inspect the backpack and its edges, making sure the handle opening and bench remain visible.
5. Export as JPG
Open Export at the top and select JPG. Set the file name to magic-backpack-edited. Keep Quality at Default, then review the on-screen credit and usage notice before starting the export.
6. Check the downloaded file
After export completes, use Download for the same photo in the dashboard. Wait for the browser download to finish, then open the file on your device and check its name and extension.
Check that the whole backpack is blurred while the empty handle opening and bench remain unchanged. Perform this check in the file you just received as well as in the editor.