Keep One Face Clear and Hide the Others
Zaktualizowano 9 wrz 2026
Keep one face clear in a group photo, cover the others, and save the result. Start by covering every face, then restore the face you want to keep.
Before you start
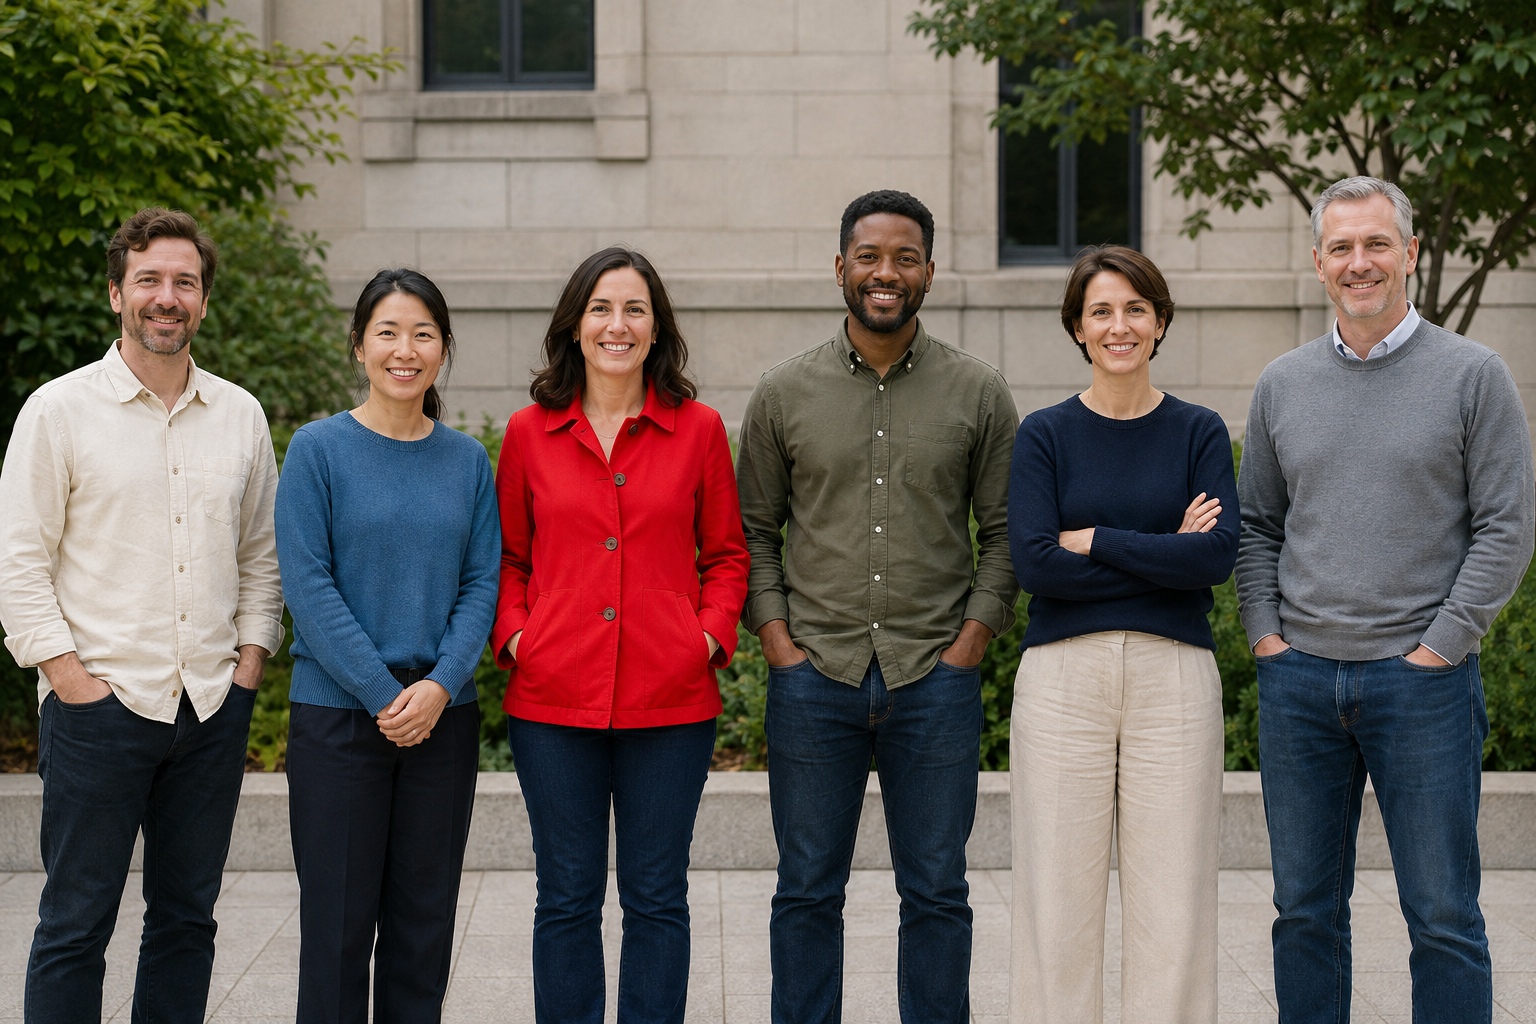
The sample contains six adults; keep the person third from the left in the red jacket clear. Download it below or use your own group photo.
Free exports do not use credits and include a watermark.
1. Choose the person to keep
In the dashboard, choose Upload files and select keep-one-six.png. After upload and analysis finish, open that photo in the Studio.
Keep the face of the person third from the left, wearing a red jacket, clear. First locate this person and their face in the photo.
2. Cover every face first
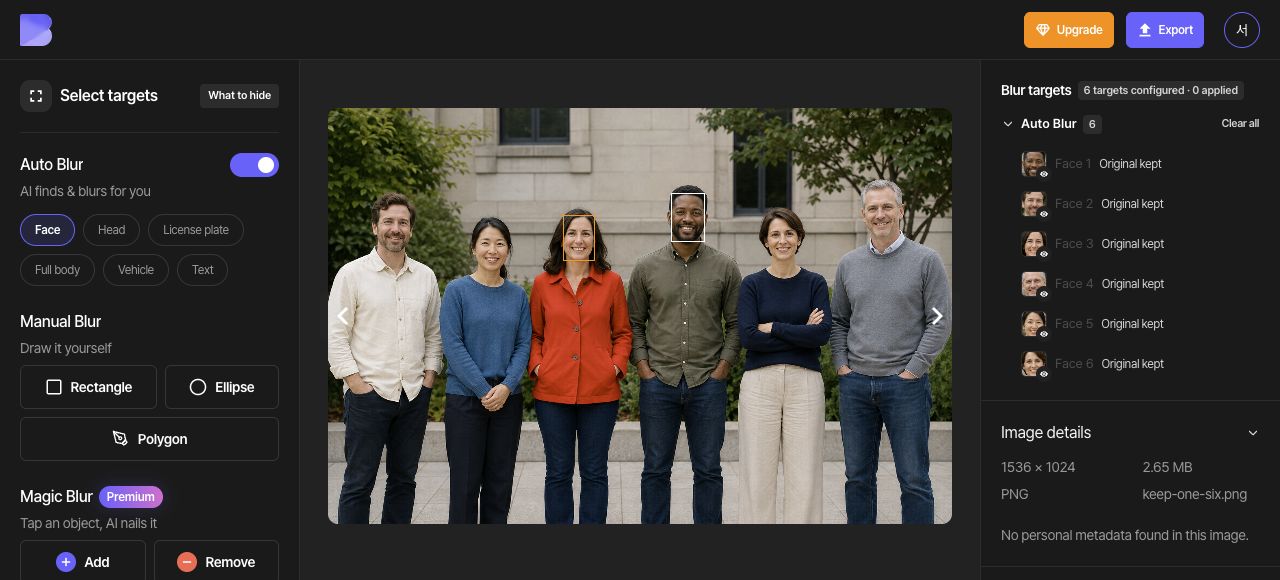
Enable Face under Auto Blur and check that all six faces are included. Choose Mosaic under Target effect and set Intensity to 10, starting with every face covered.
3. Click the face to keep clear
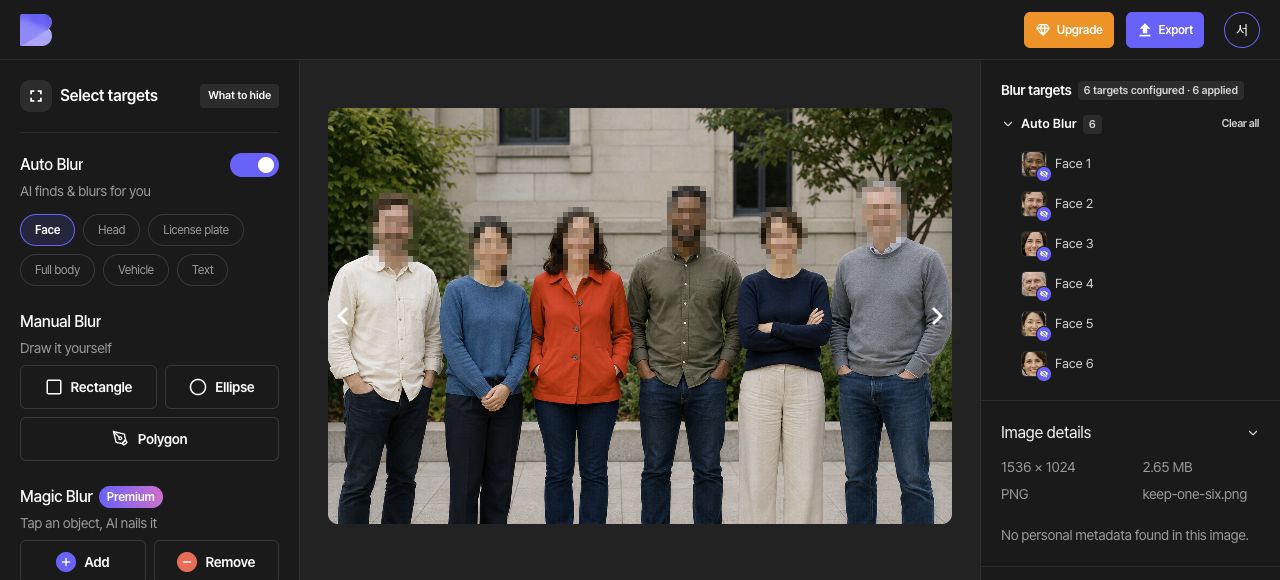
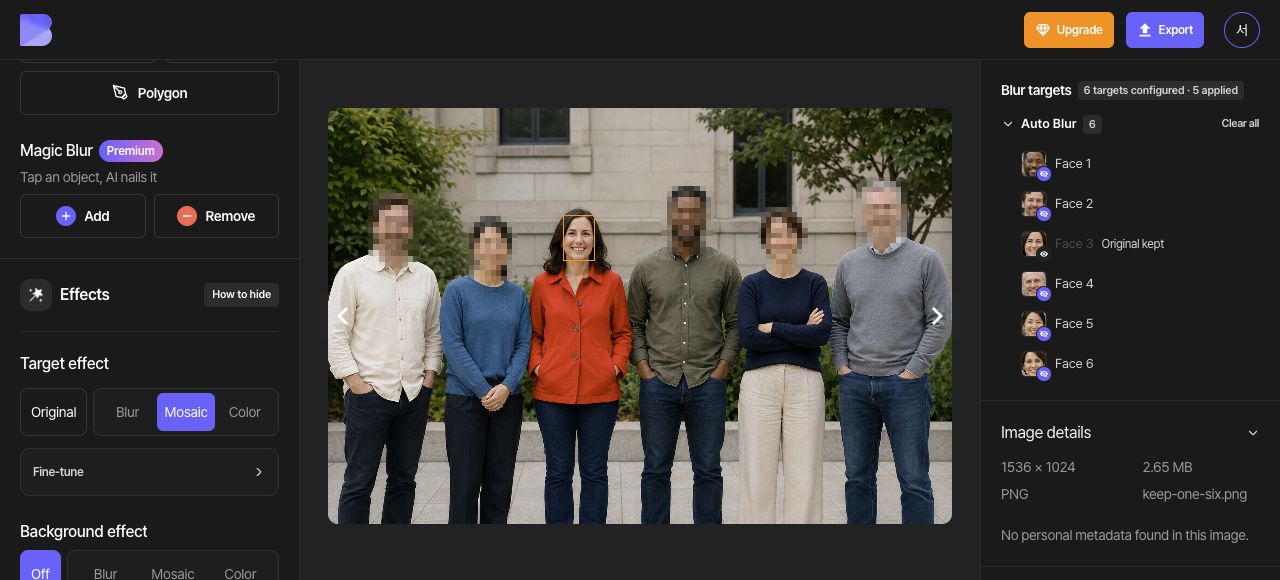
On the canvas, click the face of the person third from the left, wearing the red jacket. Clicking the face turns off its blur. In the target list, check that this face shows Original kept and that five faces remain applied. In the photo, this face should be clear while the other five keep Mosaic.
Clicking an automatically detected face on the canvas again toggles its coverage again. To select it only for editing in the individual effect panel, use its target-list checkbox.
4. Check the other five faces
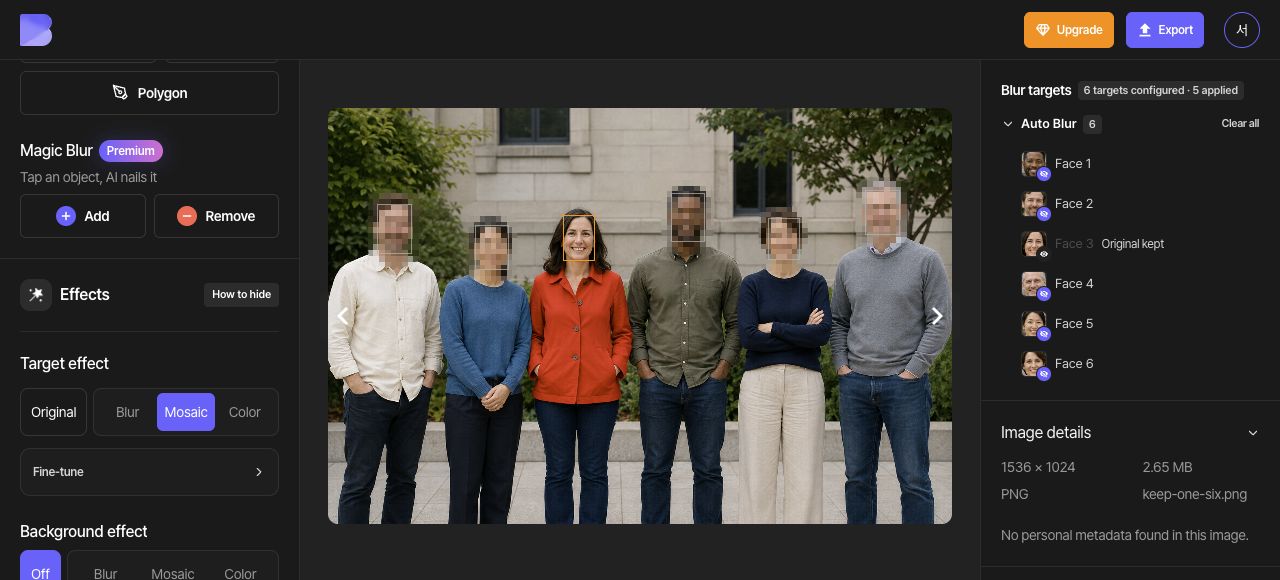
Review the full photo and confirm that exactly one face is clear and five are covered. Check that the red-jacketed person third from the left is Original, then inspect the edges of each of the other five faces.
5. Export as JPG
Open Export at the top and select JPG. Set the file name to keep-one-six-edited. Keep Quality at Default, then review the on-screen credit and usage notice before starting the export.
6. Check the downloaded file
After export completes, use Download for the same photo in the dashboard. Wait for the browser download to finish, then open the file on your device and check its name and extension.
Check that only the red-jacketed person’s face is clear and the other five are mosaicked. Perform this check in the file you just received as well as in the editor.