Hide Selected Information in a PDF and Save It
Updated Sep 9, 2026
Select the information to hide, cover anything automatic detection missed, and save the resulting PDF. This guide hides names, contact details, and addresses in a two-page application while leaving other fields readable.
Before you start
Automatic detection of names and addresses is available on Starter and above. Use manual areas for information that was not detected. Free exports include a watermark.
Download the original practice file: application-form.pdf. All names and contact details are fictional. Use this same source throughout the steps.
1. Upload the PDF and check both pages
Upload application-form.pdf from the dashboard and open its PDF project. If it is still being analyzed, wait for the detections. Confirm that both pages appear in the page list.
Zoom in to locate the names, email addresses, phone numbers, and addresses. Check the separate city and postal-code fields and the repeated name at the bottom of page 2.
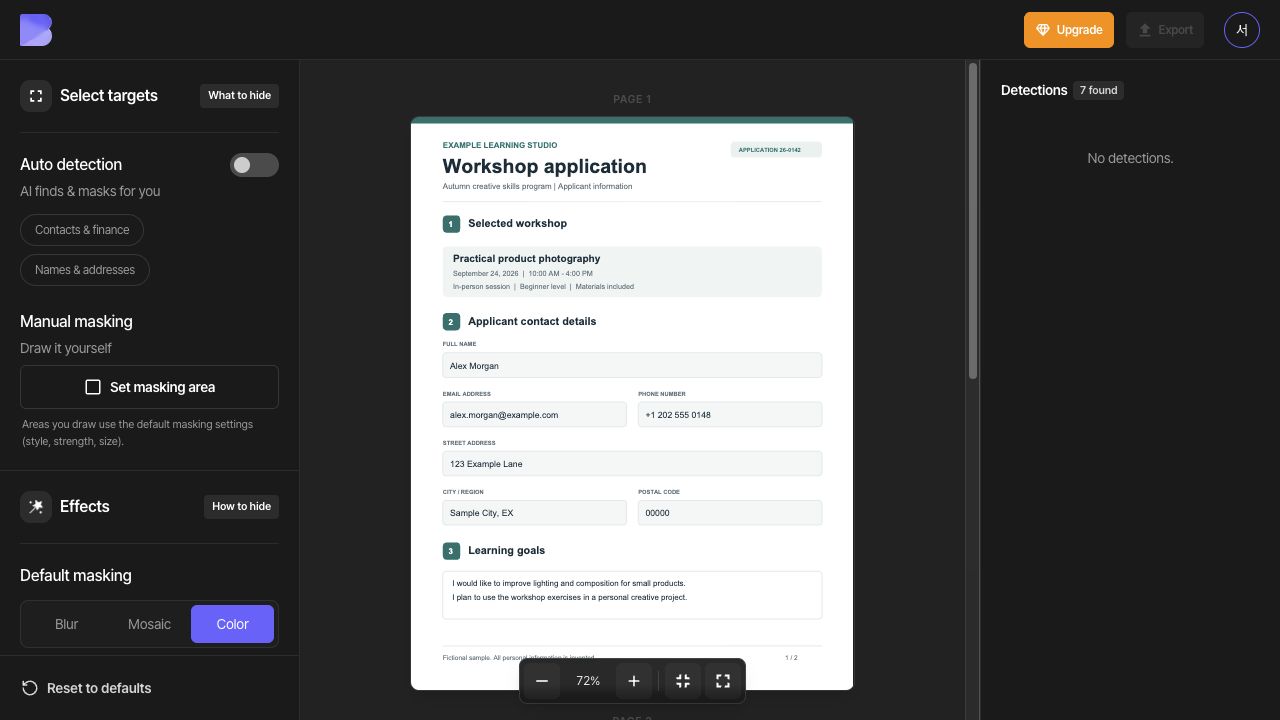
2. Include only the detected items you want to hide
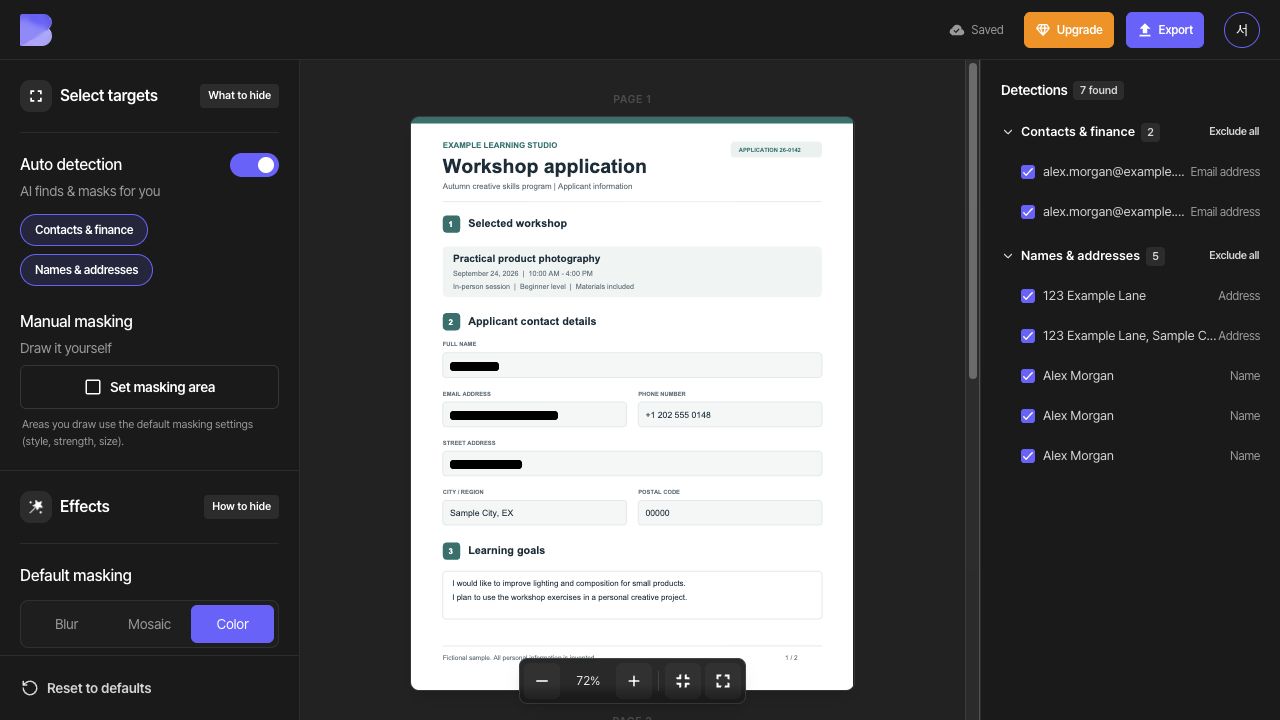
Turn on Auto detection and review the detections. Click an item to inspect its location. Check items you want to hide and uncheck items you want to keep. Select Default masking → Color → Black.
The example capture shows two email addresses, three names, and two addresses. Comparing the result with the original matters more than matching that count. To keep one particular name or address, exclude that item rather than turning off the entire type.
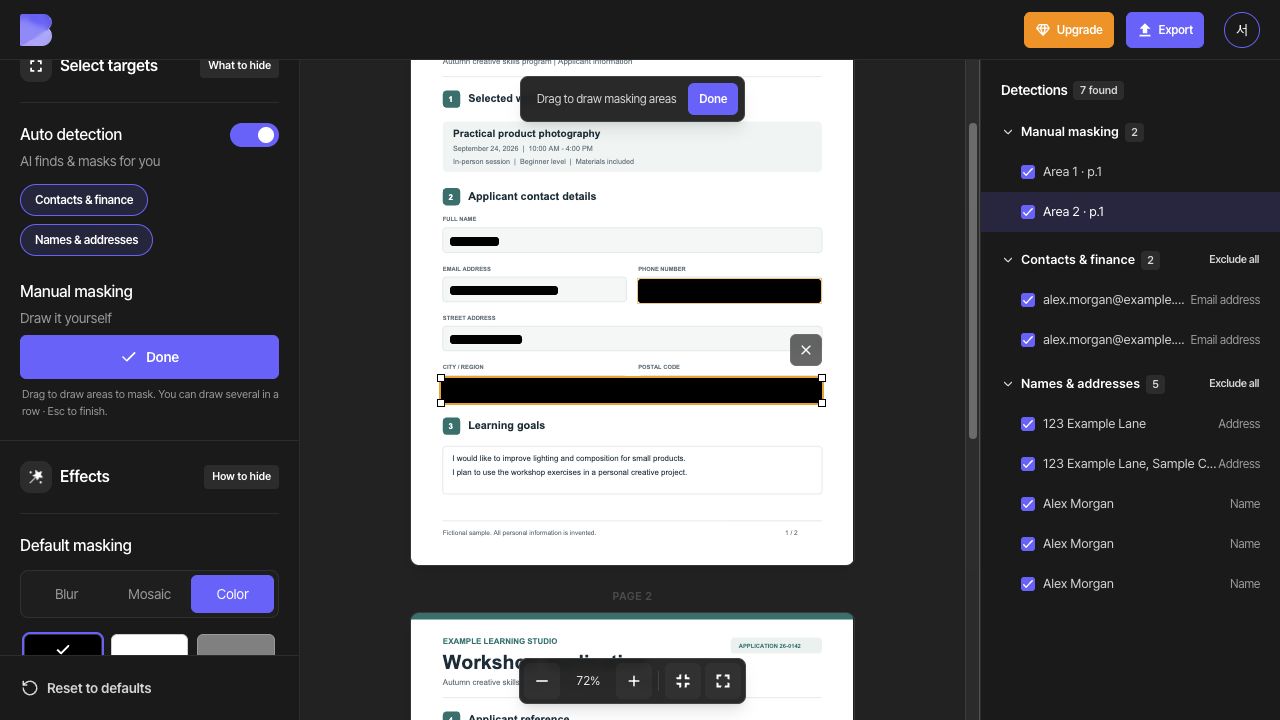
3. Cover missing information on page 1
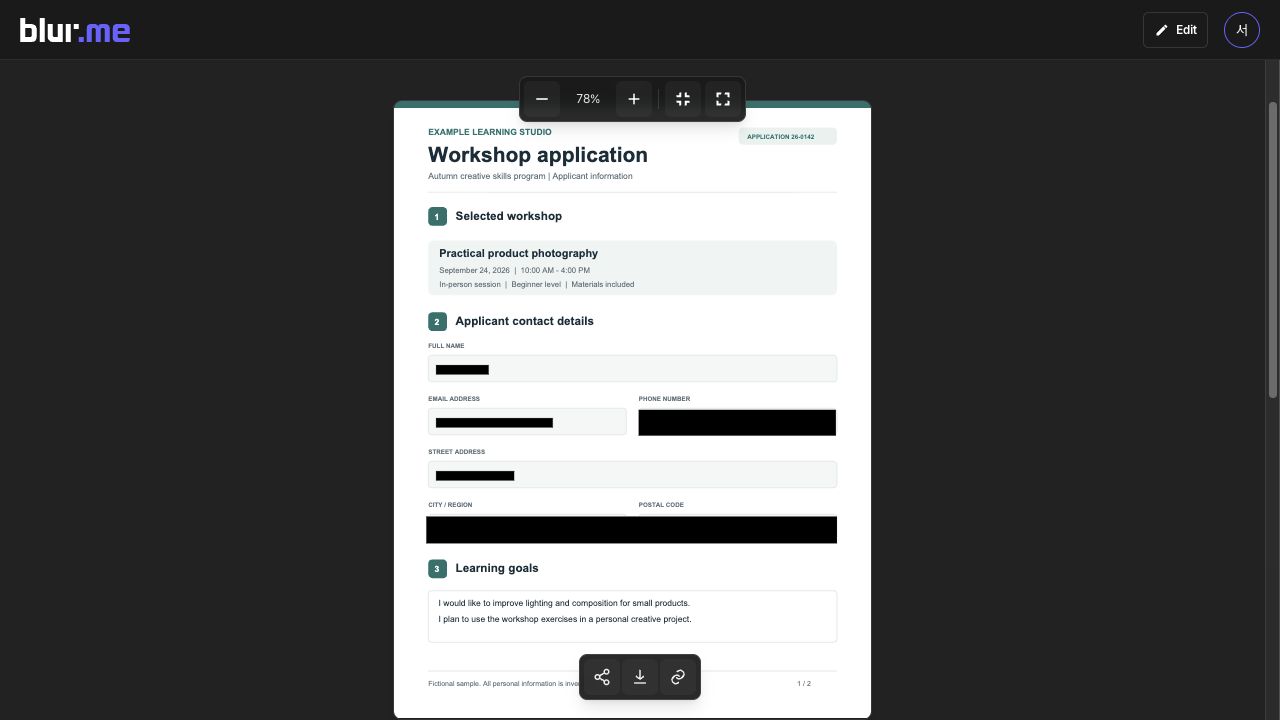
Click Set masking area and draw a rectangle around the complete page-1 phone number, including +1. In the same mode, draw another area around the city and postal-code fields together, then click Done.
Select a misaligned area to move it or drag a corner to resize it. Do not leave part of a character outside the area. Manually drawn areas use Default masking.
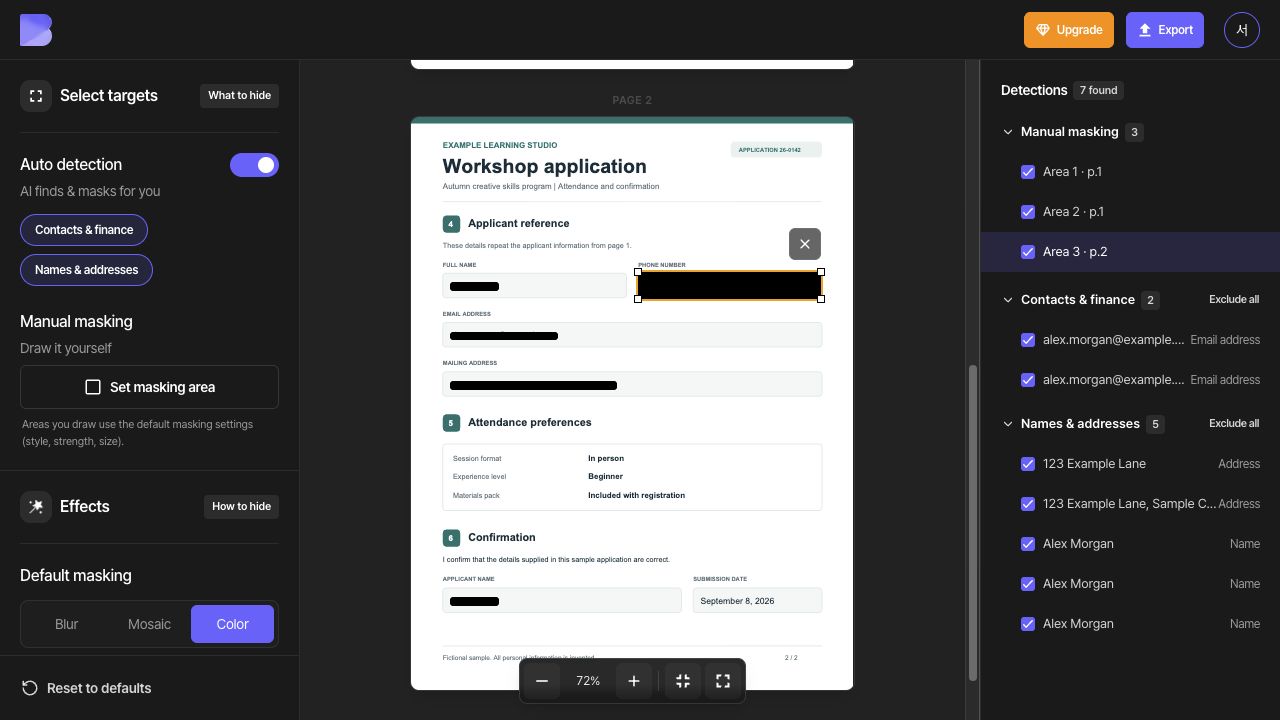
4. Review page 2 separately
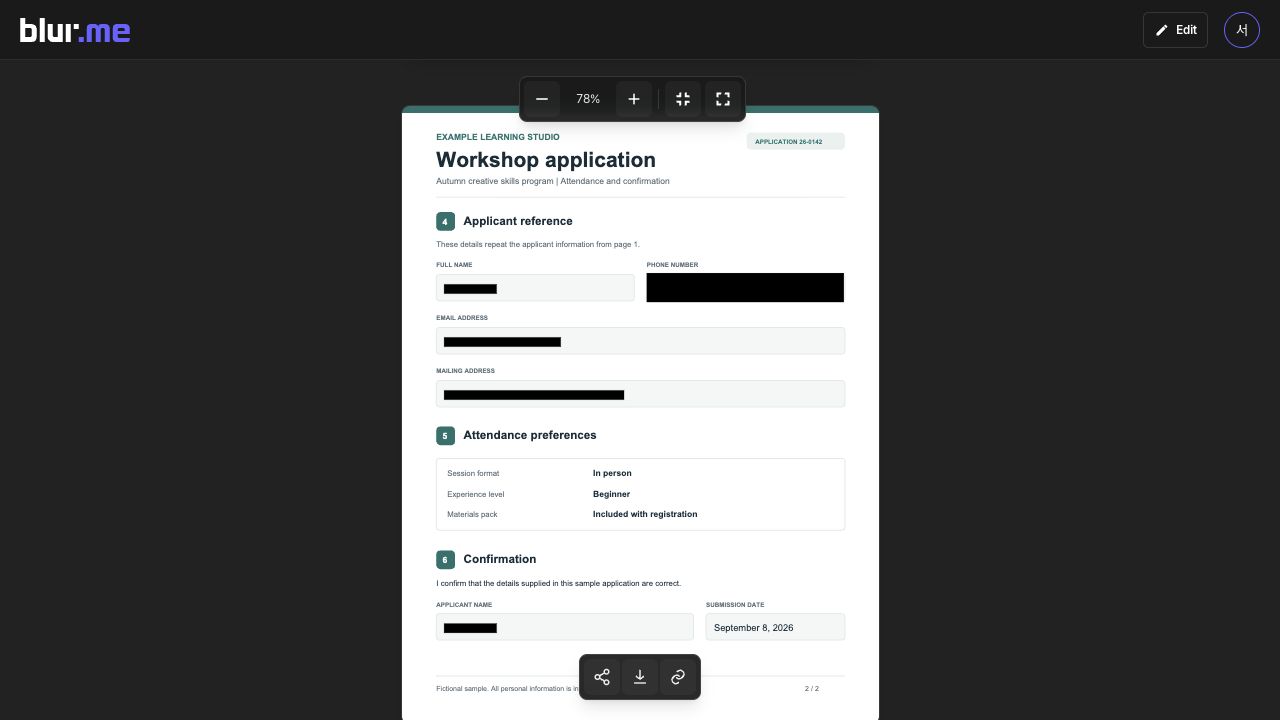
Go to page 2 and manually cover its phone number in the same way. Check the detected name, email address, and address, including Alex Morgan in the bottom confirmation field. Drawing an area on one page does not automatically cover the same position on another.
Review every page again. Check that all intended information is hidden and the descriptions and fields you kept remain readable.
Export and check the downloaded file
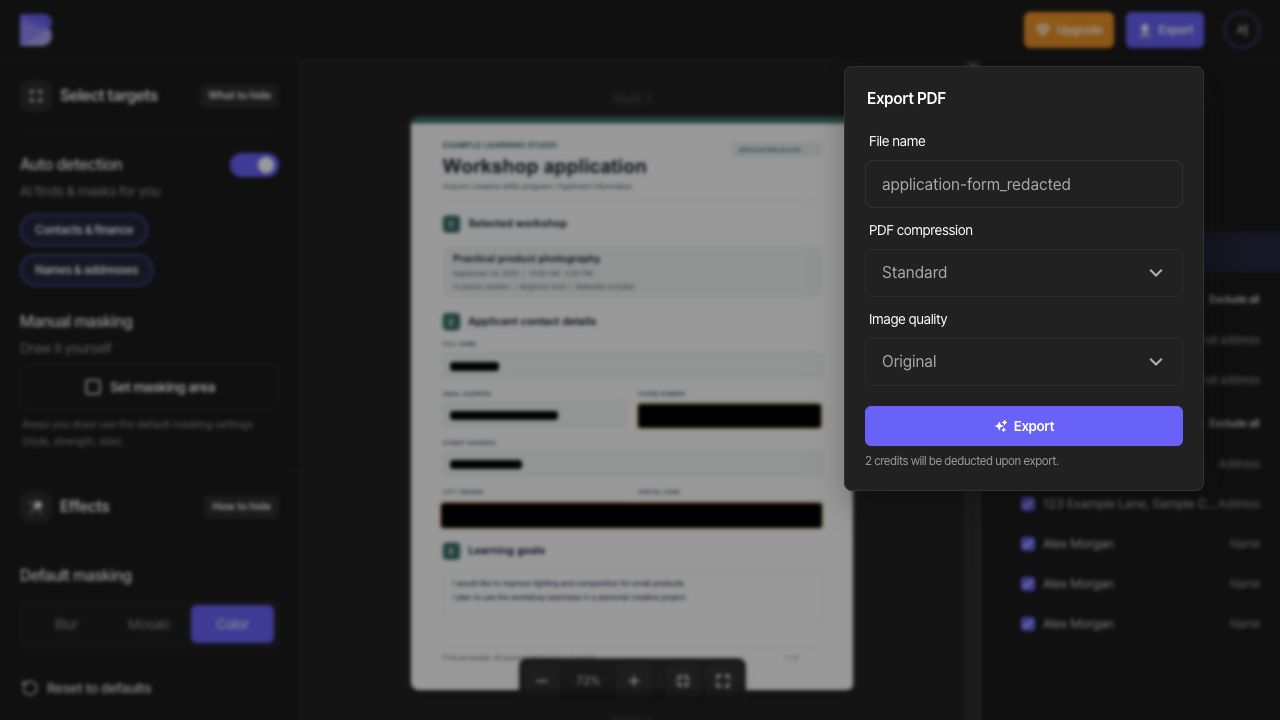
After reviewing every page, click Export. Choose Standard for PDF compression and Original for Image quality, and enter a file name that distinguishes the output from the source. Review the credit notice and start the export.
On the PDF result page, inspect both pages and click Download. Reopen the downloaded PDF in a PDF viewer on your device and confirm that both pages are present. Names, contact details, and addresses should be hidden while workshop details, learning goals, attendance preferences, and the submission date remain readable.
PDF compression offers None, Standard, and Maximum; image quality offers Original, High, Standard, and Low. If you need a smaller file, export with different settings and compare the actual file sizes and the readability of small text and photos.
To correct the result, choose Edit, adjust the masking, and export again. A file already downloaded does not update when you edit its project.
Check search and copy separately
Use Default masking → Color to hide selectable text. Color is used for content removal in the selected area; Blur and Mosaic are visual effects. Check the downloaded PDF as described below instead of judging only by its appearance.
Strings to check in this sample: Alex Morgan, alex.morgan@example.com, +1 202 555 0148, 123 Example Lane, Sample City, EX, 00000.
Search the entire downloaded PDF for the names, contact details, and other values you hid. Select text across the covered area, copy it, and paste it elsewhere to check for hidden content. If your viewer supports text export, extract the whole document and check the same strings there.
If hidden content remains visible or appears in search, copied text, or extracted text, do not share that output. Correct the area and masking method and export again. If the corrected output still has the problem, use the troubleshooting guide.
Resume editing or reset the settings
Reopen the project to continue with its saved editing settings. Check the save status before leaving the page.
Resetting settings includes previously excluded detections, restores the default effects, and deletes all manually drawn areas. If only one area is wrong, use its delete button instead.